How to Wrap Your Hands for Muay Thai (Step-by-Step)
A step-by-step guide to wrapping your hands properly for Muay Thai training, pads, and sparring.
In this guide
The Fighters Shop is reader-supported. As an Amazon Associate we earn from qualifying purchases, at no extra cost to you. Learn more
Hand wraps aren’t optional in Muay Thai. Your hands take a beating on pads, bags, and sparring partners, and the small bones in your hands and wrists are far more fragile than most people assume. A good wrap job spreads impact across your knuckles, locks your wrist in a neutral position, and gives you real insurance against sprains and fractures.
This guide walks through a reliable, beginner-friendly wrapping method used in gyms everywhere. It works with standard 180-inch wraps and adapts easily if you train in Muay Thai or cross over into boxing or kickboxing.
Step-by-step
Start at the wrist
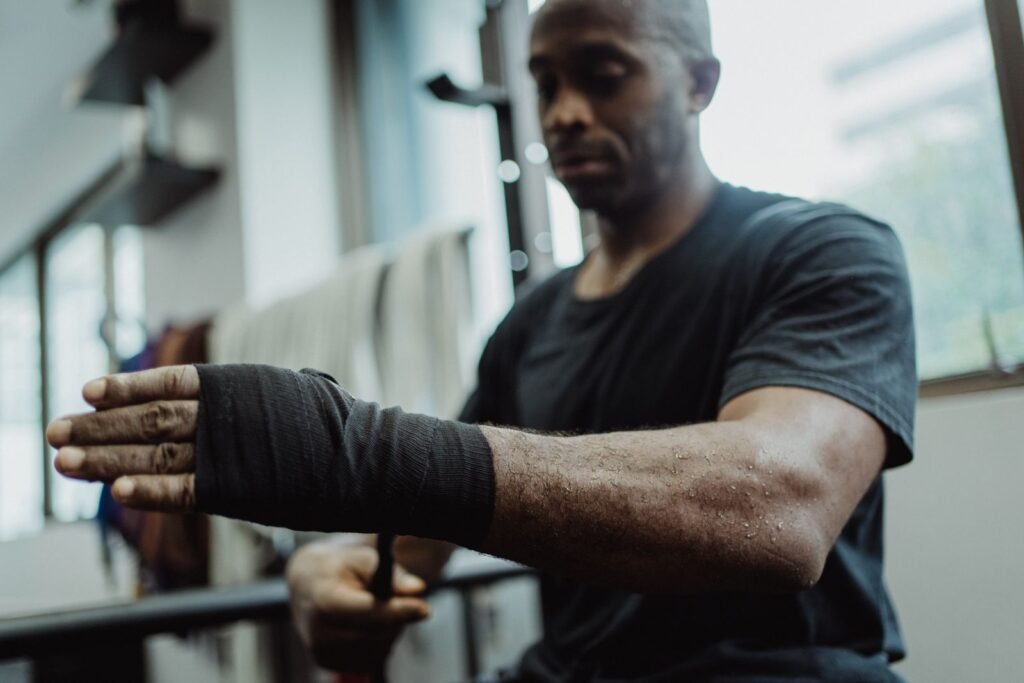
Loop the wrap around your wrist 2-3 times, thumb through the loop first to anchor it. Keep it snug but not tight enough to cause tingling or numbness. This wrist support is one of the main jobs of a hand wrap, since Muay Thai puts a lot of torque on the wrist during hooks and pad combinations.
Cross over to the hand
Bring the wrap diagonally across the back of your hand toward your pinky-side knuckles. This diagonal strip starts building the bridge between your wrist support and your knuckle protection, so keep tension even as you pull it across.
Cover the knuckles
Wrap around your knuckles 2-3 times, keeping the material flat and overlapping slightly each pass. This is the part that actually cushions impact when you hit pads or a heavy bag, so don’t rush it. Uneven or bunched material here is a common cause of hot spots and blisters.
Weave between the fingers
Bring the wrap down between your fingers (typically between the pinky and ring finger, then ring and middle) and back around the wrist. This X-pattern between the fingers keeps your fingers separated and adds structure to the wrap so it doesn’t shift once you start throwing punches.
Lock the thumb
Wrap around the base of your thumb once for support, especially important since thumb injuries happen easily on missed pad reps or awkward clinch grips. Don’t wrap the thumb too tightly or restrict its natural range of motion, since you still need to grip and defend normally.
Return to the knuckles for reinforcement
Go back over the knuckles for another pass or two, especially if you have length left over. More experienced wrappers use this stage to build extra padding over the first two knuckles specifically, since those take the brunt of contact on a jab or cross.
Finish with X-patterns across the back of the hand
Use the remaining wrap length to criss-cross the back of your hand, reinforcing the structure and using up material evenly. This also helps keep everything you’ve already wrapped from loosening during a hard pad round.
Secure at the wrist
Finish by wrapping the last few inches around your wrist and securing with the velcro closure or hook-and-loop strap. Check that the wrap feels snug everywhere with no loose sections, and make a fist to confirm you have full mobility without pinching.
Test before gloving up
Make a fist, flex your wrist up and down, and spread your fingers before putting gloves on. You should feel supported, not restricted. If your fingertips go numb or tingle, unwrap and start again slightly looser.
Common mistakes to avoid
Wrapping too tight is the number one mistake beginners make. Tingling, numbness, or discoloration in your fingertips means it’s too tight and you need to redo it, even if you’re in a rush before class starts.
Skipping the finger weave is another common shortcut. Without it, the wrap has nothing to anchor to and tends to slide down toward your wrist within a round or two of pad work, leaving your knuckles under-protected right when you need them covered.
Reusing the same wrap for months without washing it is a hygiene problem, not just a comfort one. Sweat-soaked wraps break down faster and can hold onto bacteria, so rotate between at least two pairs and let them air out fully between sessions.
Buying wraps that are too short is a sneaky issue for people with bigger hands or those who want extra knuckle padding. If you find yourself running out of material every time before you can lock in the X-pattern, size up to a 180-inch wrap or a pair specifically marketed for larger hands.
Tips from the gym
Practice wrapping your hands at home before you ever need to do it under time pressure at the gym. Coaches often see beginners rushing a sloppy wrap job right before class starts, which defeats the purpose. A slow, deliberate wrap you did five minutes ago protects you far better than a rushed one done in thirty seconds.
If you’re new, ask a coach or training partner to check your first few wraps. It’s a two-minute favor that can save you a wrist tweak or split knuckle down the line, and most coaches are happy to help since it’s a basic safety habit they want everyone to build.
Gel or elasticated wraps can be a reasonable option for beginners still building the muscle memory for traditional cotton wraps, but most Muay Thai gyms still prefer standard cloth wraps once you’re training regularly, since they mold to your hand more precisely and give better wrist support during longer sparring rounds.
Always wrap before gloving up for pad work, bag work, or sparring, even on lighter technical days. Consistency in your pre-training routine reduces the chance you’ll skip it on the one day you actually needed it most.
Recommended gear
A solid pair of hand wraps is one of the cheapest pieces of gear in your bag and one of the most important. Look for 180-inch length, breathable cotton-poly blend, and a reliable velcro closure that won’t come loose mid-round.
The Protection Gear hub has more options if you’re building out a full kit, including wraps, mouthguards, and shin guards.
- Sanabul Elastic Professional Hand Wraps – a popular, budget-friendly cotton-poly wrap with reliable stretch and closure.
- Everlast Pro Style Hand Wraps – a classic, no-frills 180-inch wrap that’s easy to find in multi-packs.
- Venum Kontact Hand Wraps – a durable option with a bit more structure, popular with Muay Thai and kickboxing gyms.
- RDX Hand Wraps – longer length option, useful if you like extra knuckle padding or have larger hands.
Once your wraps are sorted, pair them with a well-fitted pair of training gloves. Check out our guide to the best Muay Thai gear for glove recommendations that match your training style, whether that’s pad work, bag work, or sparring.
Frequently asked questions
How tight should Muay Thai hand wraps be?
Snug enough that your hand feels supported and your knuckles are compressed slightly, but not so tight that your fingers tingle or change color. Make a fist and flex your wrist after wrapping to confirm you still have full mobility. If anything feels numb, unwrap and redo it a bit looser.
How long should hand wraps be for Muay Thai?
Most adults use 180-inch wraps, which give enough length for full knuckle coverage, finger weaves, and wrist support with some to spare. Shorter 120-inch wraps work for smaller hands or lighter bag work but often run out before you finish the full pattern.
Can I use boxing hand wraps for Muay Thai?
Yes, standard boxing hand wraps work fine for Muay Thai since the wrist and knuckle support needs are nearly identical between the two sports. The main difference in Muay Thai training is you’ll also want durable wraps that hold up to clinch work and knee pad drills.
Do I need hand wraps for bag work only, or also for pads?
Wrap your hands for any contact training, including pads, bag work, and sparring. The wrist support and knuckle padding matter just as much on a heavy bag as they do against a partner, since repetitive impact is what causes most overuse injuries.
How often should I wash my hand wraps?
Wash them after every few sessions, or more often if you train multiple times a week. Sweat buildup breaks down the material faster and can become a hygiene issue, so having two pairs in rotation lets one dry fully while you use the other.
What's the difference between Mexican-style and traditional hand wraps?
Mexican-style wraps have a bit more stretch built into the fabric, which some fighters find more comfortable and faster to put on, while traditional cotton wraps offer a firmer, more locked-in feel. Both are safe and widely used; it mostly comes down to personal preference once you’ve got the wrapping technique down.
For more on building out your training setup, visit the Home Training hub or browse the full Gear Shop. For general guidance on training safety and injury prevention, the National Safety Council and resources from a sport’s governing body, such as the World Muaythai Council, are useful starting points.