How to Build a Home Boxing Gym on a Budget
A step-by-step guide to setting up an effective home boxing gym without overspending on gear you don't need.
In this guide
The Fighters Shop is reader-supported. As an Amazon Associate we earn from qualifying purchases, at no extra cost to you. Learn more
A home boxing gym lives or dies on two things: how safely the bag is mounted, and whether your gloves and wraps actually protect your hands. Get those two right and everything else is optional extras. Get them wrong and you’re looking at a cracked ceiling joist or a sore wrist that keeps you out of training for weeks.
This guide walks through building a setup that covers real training needs without wasting money on gear that looks good in a photo but doesn’t hold up to regular use. If you’re also considering other combat sports down the road, a lot of this gear crosses over cleanly with the kickboxing and MMA worlds too.
Step-by-step
Pick your bag type based on your space
If you have a garage, basement with exposed joists, or a sturdy ceiling beam, a hanging heavy bag is the cheaper and more durable option long-term. If you’re in an apartment or renting, a free-standing bag like the RDX Freestanding Punching Bag saves you from drilling into anything and can be moved or stored. Read our guide on how to choose the right heavy bag weight before you buy, since an undersized bag swings too much and an oversized one can be hard on your wrists.
Mount it securely before you ever throw a punch
This is the step people rush, and it’s the one that causes injuries and property damage. If you’re hanging a bag, use a rated ceiling mount like the XMark Fitness Heavy Bag Mount or a wall bracket such as the RDX Heavy Bag Wall Mount Bracket, anchored into a stud or joist, not just drywall. Check our Top 10 Best Heavy Bag Mounts guide for options that match different ceiling heights and bag weights.
Get gloves that match your training, not your budget alone
Bag work and pad work are rough on gloves, so this isn’t the place to buy the cheapest pair you find. A solid all-rounder like the Everlast Pro Style Training Gloves or the RDX F6 Kara Boxing Gloves will handle bag, mitt, and light sparring work without falling apart in a few months. Go 14-16oz if you plan on any sparring down the line, lighter if it’s strictly bag and mitt work.
Never skip hand wraps
Gloves pad your knuckles, but wraps support your wrist and the small bones in your hand, which is where most home-training injuries actually happen. Learn to wrap properly with our step-by-step hand wrapping guide before your first bag session, and budget for a couple of pairs so you always have a dry set ready.
Add a jump rope and round timer early
These two items cost almost nothing compared to a bag or gloves, but they structure your entire session. A simple Title Boxing Round Timer keeps your rounds and rest periods honest, which matters a lot more for conditioning than most people expect. Check out how to jump rope like a boxer for a simple progression if you’re new to it.
Build your floor space before you buy more gear
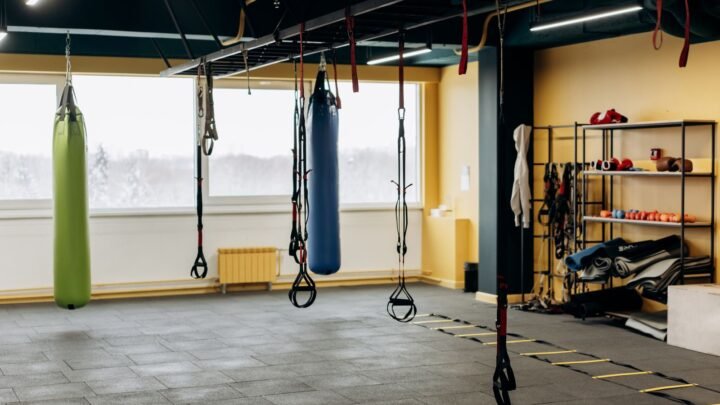
You need room to move your feet, not just stand and punch. Clear at least a six-foot radius around your bag, use interlocking rubber mats if you’re on concrete or hard tile, and make sure there’s nothing breakable within arm’s reach of your widest hook. This matters more than any piece of gear you’ll buy.
Add a reflex bag or double-end bag once the basics are dialed in
Once you’re comfortable with your heavy bag routine, a reflex bag sharpens timing and head movement in a small footprint. Our Top 10 Best Reflex Bags for Home Training guide breaks down good entry-level options, and how to use a double-end bag covers the basic drills if you go that route instead.
Keep your gear clean from day one
Sweat-soaked gloves and wraps left in a bag between sessions will start to smell and break down faster. Air them out after every session and read how to clean and deodorize boxing gloves so you’re not replacing gear early just because you skipped basic maintenance.
Common mistakes to avoid
The biggest mistake is mounting a heavy bag into drywall alone, without hitting a stud or joist. It feels secure for a week or two, then comes down mid-session. Always anchor into real structure, and if you’re not confident doing it yourself, get a contractor to check the install.
The second mistake is buying gloves based on looks or price alone. Thin padding over the knuckles feels fine for the first few sessions, then your hands start aching after every bag workout. Spend a bit more here than you want to; it’s the piece of gear that touches your body the most.
People also tend to overbuy early. You don’t need a speed bag platform, a double-end bag, and a full set of resistance bands in week one. Start with the bag, gloves, and wraps, train consistently for a month, then add based on what your sessions are actually missing.
Finally, skipping hand wraps to save two minutes is a habit that catches up with people. Wrist and knuckle injuries from unwrapped hands on a heavy bag are common enough that most coaches won’t let you touch a bag without them.
Tips from the gym
Coaches generally recommend starting bag rounds at 2 minutes with 1 minute rest, mimicking a standard boxing round structure, rather than just punching until you’re tired. This builds the pacing habit you’ll need if you ever spar or compete.
If your ceiling height limits bag swing, a heavier bag (100lb+) swings less and is often a better fit for low-ceiling garages than a lighter one. Lighter bags move more and need more room to absorb punches safely.
Rotate between bag work, shadowboxing, and rope work in the same session rather than doing 30 straight minutes on the bag. It keeps your technique sharper since fatigue is the main thing that causes sloppy form on a heavy bag.
If you ever plan to spar, even informally, get time with a qualified coach first. A bag doesn’t hit back or move unpredictably, and technique that looks fine on a bag can fall apart against a live opponent. The USA Boxing website has resources on finding certified coaches and clubs near you if you want structured instruction alongside your home setup.
Recommended gear
For the bag itself, the RDX Freestanding Punching Bag is a solid no-drilling option for apartments and shared spaces, while the Century Wavemaster XXL is another well-known free-standing choice that holds up to regular use.
For gloves, the Sanabul Essential Gel Boxing Kickboxing Gloves are a budget-friendly starting point, and the Cleto Reyes Training Gloves are worth the upgrade once you know you’re sticking with the sport. Our Top 10 Best Boxing Gloves for Heavy Bag Work guide has more options across price points.
Don’t overlook mounting hardware if you’re going the hanging-bag route. The XMark Fitness Heavy Bag Mount is a reliable choice for most garage and basement ceiling setups, and pairing it with proper hand wraps rounds out your essentials cheaply. For a broader look at outfitting your home space beyond boxing, browse the Home Training hub.
Frequently asked questions
How
A basic setup with a free-standing bag, gloves, and wraps can be put together affordably, often for less than a few months of a gym membership. Hanging bags with proper mounting hardware add some cost but tend to last longer and swing more naturally than free-standing bags.
Do
It depends on your space. Renters or anyone without access to a solid ceiling joist should go free-standing, while homeowners with a garage or basement joist generally get a more realistic bag feel from a hanging setup.
What
As a rough guide, your bag weight should be roughly half your body weight, though this varies with punching power and ceiling height. Check our guide on how to choose the right heavy bag weight for a clearer breakdown.
Can
You can build conditioning and bag skills solo, but technique errors are hard to catch on your own. Many home trainees pair their setup with occasional sessions at a local gym or online coaching to check their form.
What
Look for 14-16oz training gloves with solid wrist support and dense padding over the knuckles, since home bag work is repetitive and unforgiving on poorly padded gloves. Our Top 10 Best Boxing Gloves for Heavy Bag Work guide covers several reliable options.
Is
Free-standing bags are more convenient and don’t require installation, but many boxers feel they move less naturally than a hanging bag. For pure convenience and renter-friendly setups, they’re a solid compromise.